
I have been in a bit of a scurry these days as the Birthday Awareness Month has come and gone, but I'm ready to refocus, regroup, and reward you all with some digs that'll put the "fun" back in "fundamental" for fall (man, am I a cornball ;-)!
I made about 97% of Puppy's summer wardrobe and now I'm started on fall items!
As a motivator, I've signed up for the Creative Maven's Sew 5 Challenge. First up, I present to you, the Green Eggs and Tea Princess Skirt!
Green Eggs and Tea Princess Skirt
you will need:
- one length of fabric for main skirt (anything non-scratchy is my rule for kiddos)
- one length of overlay fabric (same weight or lighter than main skirt fabric)
- 3/4"- 1" non roll elastic
- large safety pin
- scissors
- straight pins
- a curved ruler or a compass
- pinking shears (optional)
- ribbon or tag (optional)
- about 30 mins
1. ) To decide how much fabric you need take your subject's waist measurement (in my case, about 19") and multiply it by at least 1.5 but up to three times the width of your waist measurement. I'm using about 42" of fabric by about 13" (I used the selvage of my fabric as the hem, so if you are intending to add a bottom skirt hem, I'd add a 1/2" to make a neat rolled hem or 1" if you like the look of a deep hem. ) And remember: the more fabric width, the poofier the skirt. This example is a little over two times the waist measurement
2.) Now, to prepare your top layer, use the same width as your main piece (in my case 42") and then add about three inches (for the overlap) and subtract about two inches from the length (so my length is about 11"). From there, fold the fabric in half width-wise and make a gentle curve upwards (in my example I started at 13 and 1/8" and curved upward until about 1.5" from the top).

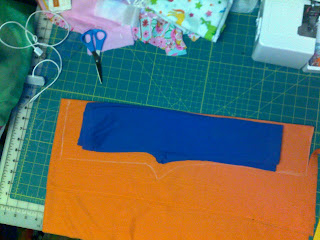
3.) If you lay out your overlay fabric right side down and then fold the main skirt fabric from both sides into themselves with the opening in the back and then fold the overlay sides into themselves overlapping about three inches on top of each other, you'll get a rough view of what your skirt will look like.

4.) Serge or finish (to finish on a conventional sewing machine, zigzag close to the edge and or cut the remaining edge with pinking shears keeping careful not to snip into your stitches) the top and sides of the main skirt piece, then, serge or finish only the top of the overlay piece. To finish off your serged chain, I recommend that when you reach the end, slowly chain off about two extra stitches and then wiggle the fabric carefully off the the end and then flip the fabric over and place it close to the edge of the right needle but being careful not to get your stitches caught under the blade, then serge on top of your already serged seam and then sharply work the fabric off the stitching plate by guiding it off diagonally.

5.) Next we're going to finish the rest of the overlay piece. For this I used a narrow rolled serged hem by taking out the left needle and removing it's thread. Then I set my serger to it's rolled hem settings (narrowest stitch width and length), remove the stitch finger (refer to your serger handbook if you don't know what this is), and then set my tensions to the settings below. It is imperative, i.m.e. (in my experience) that if you are going to use a tension setting for your lower looper of 5 or higher, you must use high quality serger thread. I use Guttermann.
If you do not have a serger or don't feel comfortable using one yet, I would zigzag stitch about a half an inch in then clip into the seam allowance every couple of inches all along the curve, and then do a narrow rolled hem with a stitch length of about 3.5 or 4.
If you're not comfortable with that (hey, I just recently got better at curved hems, and my next option was my go to move for about a year!), zigzag the edge of the fabric then get some lace, baste it to the fabric with the edges together, then iron the lace down and topstitch close to the fabric's edge. (If you have any questions on finishing, leave me a comment below!).


6.) When doing the serged narrow rolled hem, make sure you have the right side of the fabric up.

7.) This is what your easy peasy narrow rolled serged hem should look like. Isn't it neat?!

8.) Stitch the main skirt fabric together along the short sides. Then, turn the skirt right side out and edgestitch (once again assume a stitch length of 3.5 or 4) about 1/4" from the seam.

9.) When you reach the end, turn the fabric (with the needle in the fabric) stitch two stitches, and then stitch all the way back up about 1/16th from the edge. This creates a cute, clean, professional look and secures your seam!

10.) Next find the middle back of your overlay piece and match that up with the seam on your main skirt piece. Pin here and then all around the skirt, keeping in mind to overlap the front about three inches (or whatever it would be to make the skirt even with the main skirt all the way around). Make sure the overlap is centered. Then stitch from the middle of the overlap through the three layers (remember: it will be three layers for only about an inch and a half and then it will be two layers).

11.) Fold down about 1/4" from the top and press (or if your edge is serged, just finger press it down as you go). Then baste all around the skirt.

12.) If you're adding a tag place it right above your basted stitches with image or text facing you as you stitch. I recommend triple stitching the edges only. If you want to use a scrap of ribbon to indicate the back of the skirt, get a bit of ribbon about two inches long, fold it in half and pin it under the basting stitches of the back seam. You stitch it down in the last step.

13.) Fold the skirt top over a little over an inch, press, then stitch down to the left of your basting stitches all around the skirt.

14.) This is what it should look like now.

15.) To decide how much elastic to use, take your waist measurement and subtract an inch. Make sure not to stretch it when you measure, and then cut. Grab your largest safety pin and pin it to one end of your elastic. Work your elastic all the way through your casing. Make sure you pin the other end of the elastic to the casing opening so that you don't lose your elastic.

16.) Pull the elastic ends together and overlap them about an inch. Then either zigzag back and forth to secure the elastic or do a box stitch (see below). Stitch a box and then stitch an "x" inside from corner to corner.

16.) Release the elastic, and stitch the opening closed. If you are using ribbon as a tag for the back, place the folded piece under to the basted stitches and then stitch the opening closed! Done!!
Front

Back

There are countless ways to embellish this skirt to make it your own:
- gather a ruffle, and add it to the hem.
- add a large bow or flower to the front.
- add pockets
- instead of cutting the overlay on the fold, consider making it two pieces and round out the other end. Then just overlap the top in the center front and in the center back. This gives a Cinderella feel to the skirt.
- Consider leaving out the elastic altogether, making a bodice top of your choice, and then gather the skirt to the bodice bottom.




 7.)


